Download the talk and separate crew records
Free to download without an account. Each PDF is one page. Use the Word version to adapt the record to your task and approved procedures.
Supervisor field check
Download supervisor field check (PDF, 1 page)Editable supervisor field check (Word)Preview the one-page crew talk
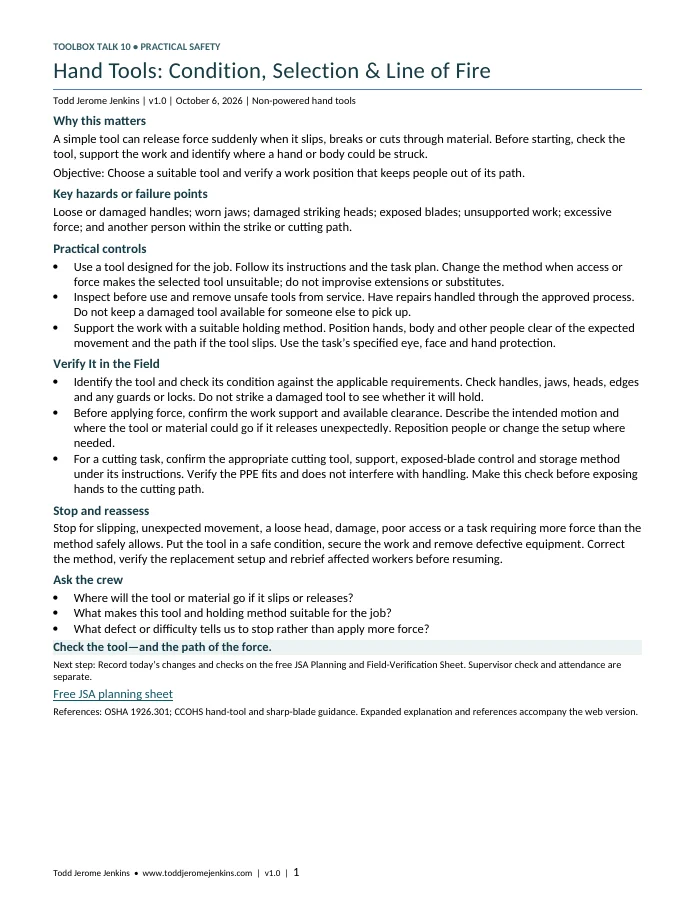
One-page crew talk, with separate supervisor and attendance sheets. Plan a 5–10 minute discussion and allow the time needed for field verification. All downloads are free; no account is required.
Learning objective
Choose a suitable tool and verify a work position that keeps people out of its path.
Start with today’s work
Illustrative scenario: A fastener will not move, and the available space forces the worker’s knuckles against nearby steel. The temptation is to pull harder. Pause and change the setup or select another approved method. The useful question is where the hand will go if resistance disappears—not simply whether the worker has gloves on.
Key hazards or failure points
Loose or damaged handles; worn jaws; damaged striking heads; exposed blades; unsupported work; excessive force; and another person within the strike or cutting path.
Practical controls
- Use a tool designed for the job. Follow its instructions and the task plan. Change the method when access or force makes the selected tool unsuitable; do not improvise extensions or substitutes.
- Inspect before use and remove unsafe tools from service. Have repairs handled through the approved process. Do not keep a damaged tool available for someone else to pick up.
- Support the work with a suitable holding method. Position hands, body and other people clear of the expected movement and the path if the tool slips. Use the task’s specified eye, face and hand protection.
Verify It in the Field
- Identify the tool and check its condition against the applicable requirements. Check handles, jaws, heads, edges and any guards or locks. Do not strike a damaged tool to see whether it will hold.
- Before applying force, confirm the work support and available clearance. Describe the intended motion and where the tool or material could go if it releases unexpectedly. Reposition people or change the setup where needed.
- For a cutting task, confirm the appropriate cutting tool, support, exposed-blade control and storage method under its instructions. Verify the PPE fits and does not interfere with handling. Make this check before exposing hands to the cutting path.
For each required control, identify the acceptance source and safe check method, assign a person with the required competence and authority, and record the actual result and time. Use VERIFIED, HOLD/NOT VERIFIED, or N/A with a reason. A checkmark alone does not demonstrate that protection works.
| Control | Safe verification | Criterion, evidence and response |
|---|---|---|
| Tool condition | Compare actual components with the relevant defect criteria; tag and remove unsafe tools. | 1926.301 and manufacturer instructions. Record tool identity, defect and disposition. |
| Path and support | Before force is applied, identify expected movement and the slip/release path; confirm suitable support. | Task method and tool instructions. Record the setup change that removes exposure; PPE alone does not correct a trapped-hand position. |
| Cutting arrangement | Check selected cutter, blade control, support and safe storage before starting. | Tool instructions and task assessment, informed by CCOHS guidance. Record readiness; unknown suitability means change the method. |
These are examples, not a complete task inspection. Check all required controls. Do not enter danger, defeat a safeguard or improvise a test. If the criterion, method or result is uncertain, hold affected work and get the appropriate technical help. No actual equipment model, product SDS or site permit was supplied for these examples; use the documents for your task.
Leader preparation and explanation
Inspect for the tool’s failure modes
OSHA 1926.301 prohibits unsafe hand tools and addresses conditions such as sprung wrench jaws, damaged striking heads and unsound wooden handles. Apply the relevant condition criteria and instructions. A general “looks fine” check can miss the component that carries the force.
Review the path before applying force
The task plan should identify the expected movement and what could move if grip or resistance is lost. This original discussion approach helps the crew identify trapped fingers, nearby faces and unsupported material. An observation made without applying force is preferable to a demonstration that creates the very exposure being checked.
Keep scope clear
This talk covers non-powered hand tools. It does not authorize energized electrical work, powered-tool servicing, improvised tool modifications or specialist repair. Those tasks need their own applicable procedures. CCOHS is used for general tool-selection and blade-handling guidance, not as a statement of U.S. legal obligations.
Stop and reassess
Stop for slipping, unexpected movement, a loose head, damage, poor access or a task requiring more force than the method safely allows. Put the tool in a safe condition, secure the work and remove defective equipment. Correct the method, verify the replacement setup and rebrief affected workers before resuming.
When conditions change, return to Pre-Job JHA/JSA: What Changed Today? and revise the affected task plan with the crew.
Three crew discussion questions
- Where will the tool or material go if it slips or releases?
- What makes this tool and holding method suitable for the job?
- What defect or difficulty tells us to stop rather than apply more force?
Short supervisor field check
- Tool selection and intended use match the actual task and required force.
- Condition inspection covers handles, jaws, striking heads, edges and relevant safety features.
- Work is supported using the selected suitable holding arrangement.
- Hands, body and other workers are clear of cutting, striking and slip paths.
- PPE, transport/storage and defect-removal arrangements are confirmed.
Use the separate supervisor sheet to record the task and change, JHA/JSA revision, acceptance source, safe method, verifier, actual result, unresolved items, corrective action, recheck and required restart authorization. Link specialist inspection records rather than copying private or unnecessary details.
Attendance and follow-through
Use the separate attendance sheet for participant names, roles and acknowledgment, meeting details, concerns, actions and rebriefs. Attendance is not proof of competence, functioning controls or permission to work. Keep completed records under the employer’s privacy and recordkeeping procedures; never post completed sign-in sheets publicly.
Related JHA/JSA resource and existing video
How to Conduct a Job Safety Analysis connects the task steps, hazards and controls. For related background, see What Is PPE and How Do You Choose It?.
Related crew discussions
One next step
Use the free JSA Planning and Field-Verification Sheet to record today’s changes and checks with the crew.
Sources and references
Sources reviewed October 6, 2026. Apply each regulation’s industry and activity scope, and current state or local requirements where applicable. Guidance is identified separately. This discussion resource supports preparation; it does not replace task procedures, required training, permits or specialist decisions.
- OSHA 29 CFR 1926.301 — Unsafe tools, wrench jaws, striking-tool heads and wooden handles.
- CCOHS — Hand Tools: General Hand Tool Operation — Selection, condition and handling guidance; Canadian guidance, not a U.S. regulation.
- CCOHS — Working Safely with Sharp Blades or Edges — Limited use: appropriate cutting tools, work support and blade control/storage.